Tuesday, November 29, 2011

How to clean in between your oven door windows

Have you ever accidentally spilled food down the front of your oven door? Nice, huh? Or all over the inside of your oven door? Don't you love how it gets caked on baked on? UGH! It takes some muscle to get clean, but it's do-able, right?

Well, that is nothing! Have you ever demonstrated the amazing dexterity and skill that I did shortly after we moved in to this house (3 years ago!!) and not only spilled on the outside of the door... AND the inside of the door... but the IN BETWEEN part of the door too? Yeah, I did. Ain't this pretty?

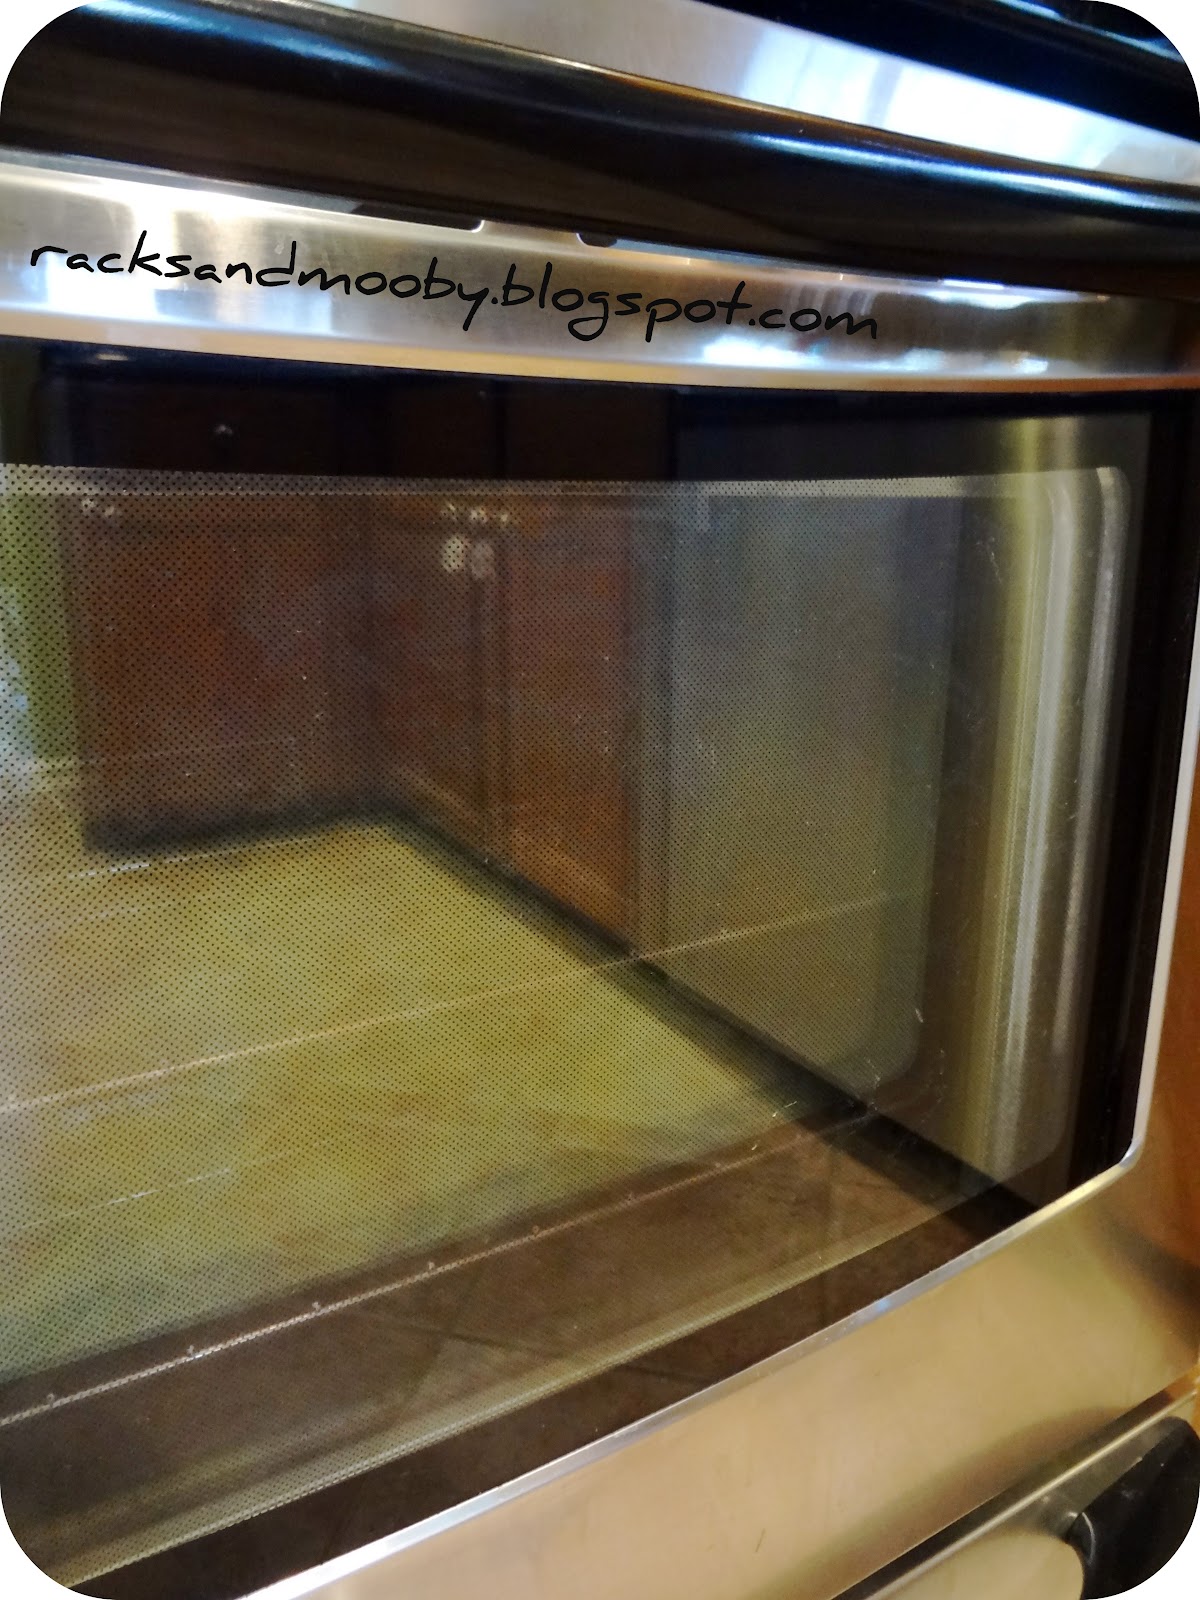
Spillage in between the glass panels of the oven door - greeeeeaaaaat.


Yes, somehow I managed to spill something {A LOT of something} right into the small vent that is right behind the oven door handle. You can't see it in the photo above, but there is an open vent hiding behind the oven door handle. Frankly, I'm not sure why there is an opening in the door right there, but I am sure it serves some sort of important technical baking need. Regardless of why it is there, I spilled a whole bunch of liquid right down in between those two glass panels. What a mess!

So I could clean all I wanted on the inside of the door... and I could clean all I wanted on the outside of the door... but that mess was still there {in between} the glass windows with no way to get to it. Mocking me. Argh! So I considered trying to take apart the door, but something told me that was probably a bad idea. With my luck, I'd never get it put back together properly or I'd break something or ruin the heat seal or whatnot. So I continued to look all around that darn door for a clue as to how I could get inside to clean in between those glass panels.

Then suddenly... while feeling around the bottom of the door with my fingers, I felt a hole... a long gap of a hole. It wasn't very wide, but it was fairly long {That's What She Said}... hmmmmmmmm. So I removed the storage drawer from the bottom of the oven, laid down on the ever-so-comfortable tile floor and looked up... and LO AND BEHOLD... an opening... hmmmmmm...

Opening in the bottom of the oven door

It is kind of hard to visualize, but the photo above is a picture taken from the angle of lying on the floor and looking up into the bottom of the oven door (while it is closed). First I considered taking off the screws you see there thinking I could just pop the front panel off the door, but again, I was too nervous to take anything apart. But then I got the bright idea... what if I could stick something up there through that gap and wipe ~in between~ those glass panels??? Yes, that is it! Unfortunately, the gap really is quite small {TWSS} (I could only just put my fingers up there - not even the palm of my hand) {TWSS} so I would have to use something fairly skinny {TWSS}. Hmmmm...

OK, this post is just filled with way too many opportunities for a "That's what she said" moment! LOL! Sorry, I will try to refrain! ;)

I decided to create my cleaning weapon of choice using a wire hanger, a match-less toddler's sock and some duct tape.

Just call me MacGyver!

{As a side note, I am terribly ashamed to admit that I found that child's sock under the oven when I removed the bottom drawer. Seriously?? How the heck does a toddler's sock end up under the stove??? Hmmmm... maybe that is the end of the worm hole for all the socks that seem to magically disappear from my dryer?? Eureka! Then again, maybe we're just slobs with fire hazards and sockless children. Sorry, I mean half-sockless children. *sigh*}

Anyway, I became MacGyver and created this...

A beautiful wire toddler sock rose! LOL

You can't tell in the picture, but I also stuffed a small piece of paper towel into the sock before I taped it all up to try and give it a little more depth. I then sprayed the sock with some cleaner (Shaklee Basic H - degreaser formula) and stuck my sock-tool up into that gap at the bottom of the door. It took a lot of awkward maneuvering because the gap is so narrow and my sock-tool was pretty flat (because otherwise I wouldn't have been able to get it up in there in the first place) {TWSS} but I did my best to rub that sock-tool back and forth along the messy spillage inside there. 

It didn't do a perfect job by any means, but all things considered, it worked fairly well and I was quite proud of myself. {sorry I don't have any pics of the sock-tool in action, but I couldn't manage it all by myself}. Here is the finished result...

Much better looking! A nice clean in-between oven window!

As I said, it isn't perfect by any means, but it certainly looks better than it did before! Let's look at a before and after comparison...


How much better it looks now that in-between the oven door windows is a bit more clean!

Not perfect, but much better! Not too bad for an amateur! :) And that's how you clean between the glass of your oven door!

Now... I am sure there is at least one of you out there with a spill issue in-between their oven glass panels! Thanksgiving drippings anyone?? ;)

{Note: as mentioned, I may have been able to just take off that front panel, but I didn't want to risk messing with all that dis-assembly and whatnot so this worked just fine for me. Do whatever feels safest for you!}


**UPDATE** - A few months ago, I did a DEEEEEP cleaning of the oven, taking the door of the hinges and crawling in there to scrub and everything. Since I had the door off the hinges, I decided to see if I could, in fact, get that frong panel off so I could more easily access the glass. As you can see in that one photo above, there were some screws along the bottom of that front panel so I decided to try those. I unscrewed them in the hopes the stainless steel panel would just lift off, but it seemed to still be attached somehow at the top of the door. There were no visible screws up there and the panel wouldn't easily just pop off so I decided not to force it. However, I was able to lift the bottom edge up (while the top edge was still attached) and create a gap big enough to allow me to more easily get in there and wipe those glass panels clean. It was definitely more easy to clean them than going the wire hanger/toddler sock route, but if you don't have panel screws on your door or are too nervous to mess with your door, just continue to enjoy the hanger trick! :)

This post was featured! Thank you! Please be sure to check out these awesome blogs!

 Organize and Decorate Everything


Linking up to these parties:


Pin It!

Friday, November 18, 2011

Tiny Prints Photo Holiday Cards

Do you send out holiday cards to your friends and family? Are you a "traditional" card type of gal/guy or do you opt for the "newsletter" type of greeting? Or are you like me and go the photo card route?

I gotta be honest, I love photo cards. I love giving them and I love getting them. I don't often get to see everyeone on my holiday card list so it is always so much fun to see pictures of everyone to see how they have changed/grown over the past year.

I've been sending out Photo Holiday Cards since SweetPea was born 5 years ago. And I must admit that I find a strange pleasure in scanning through all of the photos from the past year searching for the perfect selection(s) to share with our family and friends.

This year, I've decided to try a new vendor for my photo cards... Tiny Prints. Have you ever heard of them? I'll be honest that I haven't ever used them before, but I've received many invitations, baby announcements and Christmas cards made by them over the years and they are all amazing! So cute, stylish and really good quality. I'm always impressed when I turn over the card to see that little Tiny Prints identifier on the back and think "yup, I had a feeling!". :)


So this year, I thought "Why not? Why don't I give them a try?". So I headed over to their website to check out their Holiday Card selection. Boy, was I impressed - so many awesome choices. I'm going to have a hard time choosing, that is for sure! I usually try to go with a non-religious/non-Christmas-specific card since some of our friends don't celebrate Christmas and, thankfully, Tiny Prints has several options that fit this criteria. I've got a couple of photos in mind (from our summer vacation) and so far, here are some of my favorite styles...


I love the bright colors on these first two...


This one's "Warm Wishes" would go really well with the photo I am thinking of using...


This one would be great for my second photo choice of my two girls...

Love and Laughter

Not sure how I'll be able to choose! How about you? Are you a photo card person like me? If so, I bet Tiny Prints may have just what you're looking for!


Legal disclosure: I am receiving 50 free photo cards from Tiny Prints for writing this post. However, my opinions on their site and products are my own and not influenced by the reciept of the cards.


Pin It!

Thursday, November 17, 2011

Rock Star Marshmallow Pops

We recently celebrated SweetPea's 5th birthday {darn they grow up fast!} and she wanted a ~ROCK STAR PARTY~. Woohoo!!!!


Um. Yeah. OK. Whaaaaaat?


But, not to be put off, I hopped online and found a bunch of ideas and said "SURE, Sweetie!! No problemo!" And I thought....

Hot Pink ~ Black ~ White ~ Aqua
Guitars ~ Stars ~ Zebra Stripes

...Yes, I could do that!

I haven't gotten my act together yet to give a full round up of the party so you'll have to wait a little bit for that. But in the meantime, I thought I would give you a ~taste~ with one of the yummy treats I we made. How does THIS look?? Ka-pow!


Rock Star Marshmallow Pops

Yes, you've got that right folks... Rock Star Marshmallow Pops!!

I gotta tell you, this was SO incredibly easy that my two pre-schoolers were able to do 95% of this project (with minimal supervision).

The first thing I did was make the pop stand. I bought a large piece of white foam at Michaels (using a 40% off coupon, of course). I decided to secure it in a round cake pan to give it a little more stability (which may or may not have really been necessary) so I cut it down to size using a serated kitchen knife. (Note: You'll probably want to do this outside so you don't get white styrofoam fluffs all over the place. Trust me.).


My styrofoam and cake pan base

Then I covered the styrofoam with some awesome zebra wrapping paper and coordinating ribbon and poked my lollipop sticks in to "pre-drill" the holes ensuring the spacing would be adequate for the width of the marshmallows.


Insert lollipop sticks ensuring adequate spacing for marshmallows

Next I melted some white vanilla Wilton candy melts in the microwave (following the directions on the package) and got my other supplies (marshmallows and sprinkles) and helpers (SweetPea and Boogey) ready.

I didn't take pictures of this part (and it may or may not have really been a necessary step) but we dipped the end of each lollipop stick into a little bit of the melted chocolate and then stuck them into the bottom of each marshmallow to ensure they didn't fall off the sticks. We let that set up for a few minutes and then got to dipping.

You could do any color scheme your heart desires, but I used a mixture of hot pink and chocolate brown sprinkles (that I had found at the grocery store) to go with the rock star theme. I mixed in some silver edible glitter stars (Wilton brand purchased at Michaels, using a 40% off coupon) to really glam it up.

First we dipped the top of the marshmallow into the melted chocolate and then dipped the wet top into the sprinkles. Then we just stuck the whole thing into the base for drying.


Even preschoolers can do this activity!

Here are a bunch of pictures of the finished product.


"Marshmallow Pop Stars"

Love the colors!


Aren't those silver star sprinkles cute??


Yum!!


Rock Star Marshmallow Pops ROCK!

These were a HUGE hit at the party! Only one was left at the end of the day! I will definitely be making these again for future parties. And I may even make some for Holiday Gifts.


Note: We made our marshmallow pops the morning of the party since I wasn't sure how fresh they would stay (since there was so much "exposed" marshmallow). They lasted fine all day out on the table, but the sole pop that was left the next morning had definitely lost its freshness. I think they would have been just fine overnight if they had been in an air-tight container and I also think they'd stay fresher longer if you dipped the entire marshmallow in chocolate which would then act as a protective layer. (I didn't want to do this as I thought it would just be too much hard chocolate for such an airy treat).

What do you think? Yum-factor?? Yes, I think so. :)

**See more details from this Rock Star party HERE**


This post was featured! Thank you! Be sure to check out these awesome blogs!


Linking up to these awesome parties:
The Frugal Girls
A Little Knick Knack
Simply Designing
While He was Napping
Tatertots and Jello
Craft Envy
Nifty Thrifty Things
Keeping it Simple
J&M's Eye Candy
House of Hepworths
Remodelaholic
Somewhat Simple
It's A Keeper
Fingerprints on the Fridge
Truly Lovely
A Bowl Full of Lemons
Small FIne Print
Be Different... Act Normal


Pin It!

Yum!

More details to come!


Pin It!

Thursday, November 10, 2011

Simple yet stylish present wrapping.

During my hiatus, the Heela and I celebrated our 6th wedding anniversary. Sadly we didn't get to celebrate like we did last year (remember this fabulous time?) - boo hoo. But we did get a babysitter for the kiddos and go out for a way-too-expensive but oh-so-wonderful dinner. Since we knew we were going to splurge on a decadent meal, we agreed I decided to keep gifts to a minimum.

I have always made a point to get the Heela at least one gift that follows the traditional anniversary gift guide. (This is the site I usually refer to). For the 6th year, the tradition is candy. Another site I had looked at specifically named chocolate as the traditional gift. Chocolate?? No problemo! :)

The Heela is actually not a big candy freak (unlike me) and is pretty much content to do without it on a regular basis. But once every 6 months or so he'll "binge" and dark chocolate is his vice of choice. So I decided to pick up some Hershey's Dark for him and leave it at that. I knew it would satisfy his biannual sweet tooth as well as my anniversary present obligation. Perfecto! Minimal and delish!

Here is the end product...


Simple Wrapping Job

I have to admit my nerd-osity at the fact that I was absolutely ~thrilled~ to find that the multi-pack of Hershey's Dark bars came in a SIX-pack. I actually stood there in the candy aisle in Walmart and said {OUTLOUD}...

"How perfect! Six candy bars for our six year anniversary. What a FABulous coincidence!".


Seriously, folks. Outloud! Could I BE any nerdier?


Yes, I'm a nerd-ola.

I decided to be really cheap frugal and use the bag I got at Hallmark with my anniversary card as "wrapping paper". I just cut it down the side and turned it inside out and voila!


Free wrapping paper!

Then I added a few cutouts made from scrap pieces of cardstock (I cut them using my Silhouette but you could do them by hand) and wrapped it all up with some green and blue baker's twine. So simple but so nice. Even for a boy. ;)


Baker's twine adds the finishing touch.
And there you have the perfect anniversary present. Cheap and tasty! {That's what SHE said!}. The Heela was honestly impressed with my wrapping skills and much appreciated the chocolate (which is currently being hoarded in an undisclosed location - darnit!!).


Simple yet stylish wrapping job.

One of the things I like about this style is that you can change it up for any event. For Christmas/holiday season, you could put a cutout snowflake or Christmas tree under the twine. For a birthday, you could do a cutout of a cake. For Valentines day, a heart. Really the options are limitless!


What are your thrifty yet elegant wrapping ideas?


Also, do you follow the traditional anniversary gift guide?


This project was featured - thank you!!


Linking up to these awesome parties:

Pin It!

Thursday, November 3, 2011

Organizing extra tin foil, plastic bags, etc.

After a much-too-long hjiatus, I'm back. Sporadically. It will have to be enough! SO let's get back to it! :)

If you've been around for any length of time here on the blog, you know very well that I love to get a good deal. I shop sales, use coupons, stockpile (not in an extreme way though), yada yada yada. And one of the items I always seem to have an excess of are ziploc bags, tin foil and the like. In our kitchen, we have a drawer dedicated to these items and all of my essentials fit in there just fine. However, there isn't room for my non-essentials (i.e., parchment and wax paper) or for my excess items. So they would just get thrown onto the bottom shelf of our {invaluable} walk-in pantry like this...


Extra wraps and bags - what a mess!

Mind you, they were kinda working here in the sense that there was room for all these extras, but it was just always such a mess. And they would never stand up straight and it was just annoying and obnoxious. So I picked up the following at Walmart for less than $8...


I used the "wrap rack" and the "cabinet rack" from this set of 3 and hung them on one of the free walls in the pantry and... TA DA!


Organized boxes look so pretty!

It was such a quick, simple and inexpensive fix, but oh so wonderful! Now it not only looks so much better, it "works" better. Not to mention that I've now freed up some space on the shelf for something new! :)

Side note: this is the same rack set that I used for organizing my cleaning supplies in THIS POST. I really like how versatile it is!

Pin It!
Related Posts Plugin for WordPress, Blogger...