So it just dawned on me that I never posted the details about how to make the "Pin the Pot 'o' Gold on the Rainbow" game from Boogey's Rainbow Party (seen HERE).
I won't claim that this was my original idea, but as mentioned in my original post about the party, I was inspired by this post over at Chickabug and decided to do my own take on it.
First thing I did was track down the same piece of foam core that I had used for SweetPea's Rock Star Party {HERE} where we played "Pin the Guitar Pick on the Guitar". Then I simply turned that {used} baby over and prepared the nice clean back side of it for this project! {Have I mentioned I'm cheap frugal?? I like to re-use and re-cycle party materials as much as possible!}
Next, I used a piece of pinned-down-string tied to a pencil to draw the perfectly shaped arcs for the different colors of the rainbow. Since I was going to enlist the kiddos for help with this project, I crudely colored in each section with the appropriate color so they didn't go too crazy with their "artistic license".
I happened to have this big container of pre-cut paper squares from my old scrapbooking stash so I weeded through it to find a variety of representatives for each color family. I picked out 3 patterns for each color to create a nice varied look (but you could keep them identical if you prefer).
 |
| Pre-cut Paper Squares in every color of the rainbow! |
Then I gave each kid a glue stick and let them go to town gluing the squares onto the appropriate row. I didn't ask them to follow any sort of pattern and just told them to put the right color in the right row. I have to say they did a really great job keeping the squares in a nice straight arc on their own! ("Straight Arc"? Is that an oxymoron?!? LOL)
 |
| Glue the paper pieces in the appropriate row. |
Here is the rainbow after all the squares had been placed. I really like how the variety of colors and paper used for each row came out - really adds some nice visual interest!
 |
| Paper Squares form a Pretty Rainbow! |
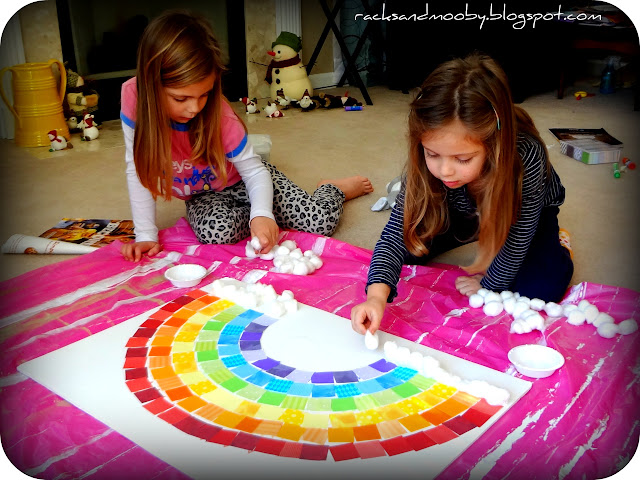
The final step was to add the clouds at the base of each end of the rainbow. I gave each kid a pile of cotton balls and some Craft Glue and, again, just let them go to town. It was interesting to watch them take different approaches with how they applied their cotton balls (again, no guidance from me) and I was surprised that they both took the opposite approach of what I would have expected for each of them. SweetPea just piled hers on in no particular order. Boogey applied hers in nice, neat, straight rows. I really expected them each to do it the opposite way! Shows how little this Mom knows about her own childrens' personalities! Shows how much your kids can always surprise you! ;)
 |
| Adding Cotton Ball Clouds to our Rainbow |
Since the "pinning" area was so small, I deliberately purchased the smallest "pot of gold" stickers I could find at Michaels (using a 40% off coupon, of course). Then marked the spot with a black marker. The kids had a lot of fun making this and the guests had a lot of fun playing!
 |
| Finished Pin the Pot of Gold on the Rainbow Game for Rainbow Party |
See Boogey's nice straight cotton ball lines on the left and SweetPea's big pile on the right? So funny as I totally would have expected them to do the opposite based on their normal personalities! Crazy kids! Always keep ya guessing! :)


That is so cute!!!!!Where on earth did you find those fancy little pre-cut squares? I love birthday parties!
ReplyDeletewww.landmwilliams.blogspot.com
Very Cute :) I did a "Kiss the Frog Prince" for Jack & Molly's Princess & Dragon party. Printed out a huge frog prince, cut out kisses, and used double side tape for the kids to stick it on. Whoever landed on the frog got a prize!
ReplyDelete