Showing posts with label Before and After. Show all posts

Thursday, December 8, 2011

Ch ch ch ch changes...

So we've had some big changes going on recently...

Namely...


White Kitchen Cabinets!

We painted our kitchen cabinets white! AND I LOVE IT!!


It is such a huge change and I couldn't be more pleased with the decision. I will be honest that we didn't do it ourselves - we hired it out. But with working full-time and 2 pre-schoolers in the house (yeah, you try and prevent 2 little ones from touching anything in the heart of the home for an extened period of time!)... I knew it would be worth the expense. And it was!

I DID however, do all the installation of the beadboard and baseboard around the island and on the outer edges of the cabinets. Yup - all by myself! Not even any help from the Heela! Quite proud of myself, if I do say so myself. :) I'll post details on that project soon.

(The walls were painted green during the summer when we had the whole lower level re-painted)

We've got a few more things to do in here to really pull it all together, but for now... I'm blissfully happy with it!

How do you feel about white cabinets? Trendy? Timeless?


Pin It!

Tuesday, November 29, 2011

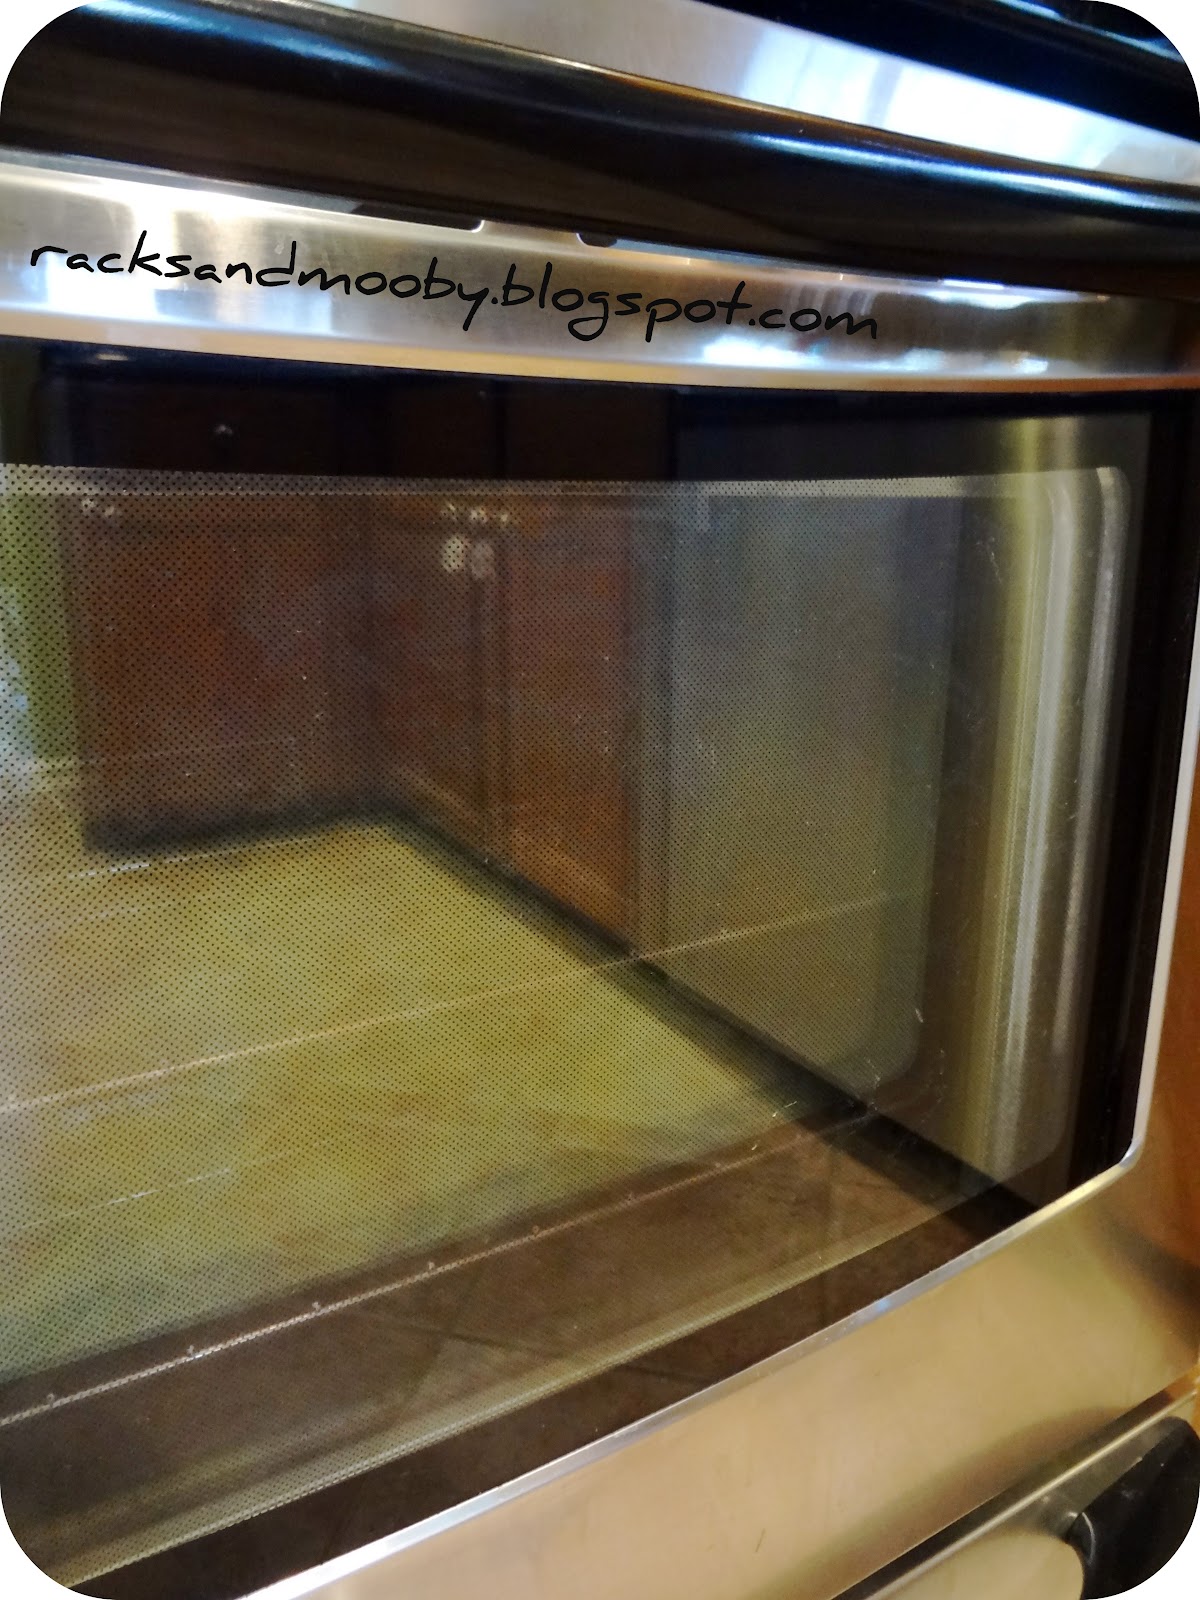
How to clean in between your oven door windows

Have you ever accidentally spilled food down the front of your oven door? Nice, huh? Or all over the inside of your oven door? Don't you love how it gets caked on baked on? UGH! It takes some muscle to get clean, but it's do-able, right?

Well, that is nothing! Have you ever demonstrated the amazing dexterity and skill that I did shortly after we moved in to this house (3 years ago!!) and not only spilled on the outside of the door... AND the inside of the door... but the IN BETWEEN part of the door too? Yeah, I did. Ain't this pretty?
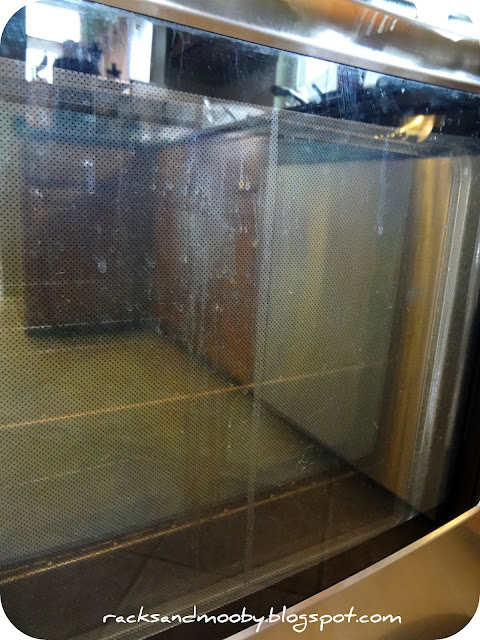
Spillage in between the glass panels of the oven door - greeeeeaaaaat.


Yes, somehow I managed to spill something {A LOT of something} right into the small vent that is right behind the oven door handle. You can't see it in the photo above, but there is an open vent hiding behind the oven door handle. Frankly, I'm not sure why there is an opening in the door right there, but I am sure it serves some sort of important technical baking need. Regardless of why it is there, I spilled a whole bunch of liquid right down in between those two glass panels. What a mess!

So I could clean all I wanted on the inside of the door... and I could clean all I wanted on the outside of the door... but that mess was still there {in between} the glass windows with no way to get to it. Mocking me. Argh! So I considered trying to take apart the door, but something told me that was probably a bad idea. With my luck, I'd never get it put back together properly or I'd break something or ruin the heat seal or whatnot. So I continued to look all around that darn door for a clue as to how I could get inside to clean in between those glass panels.

Then suddenly... while feeling around the bottom of the door with my fingers, I felt a hole... a long gap of a hole. It wasn't very wide, but it was fairly long {That's What She Said}... hmmmmmmmm. So I removed the storage drawer from the bottom of the oven, laid down on the ever-so-comfortable tile floor and looked up... and LO AND BEHOLD... an opening... hmmmmmm...

Opening in the bottom of the oven door

It is kind of hard to visualize, but the photo above is a picture taken from the angle of lying on the floor and looking up into the bottom of the oven door (while it is closed). First I considered taking off the screws you see there thinking I could just pop the front panel off the door, but again, I was too nervous to take anything apart. But then I got the bright idea... what if I could stick something up there through that gap and wipe ~in between~ those glass panels??? Yes, that is it! Unfortunately, the gap really is quite small {TWSS} (I could only just put my fingers up there - not even the palm of my hand) {TWSS} so I would have to use something fairly skinny {TWSS}. Hmmmm...

OK, this post is just filled with way too many opportunities for a "That's what she said" moment! LOL! Sorry, I will try to refrain! ;)

I decided to create my cleaning weapon of choice using a wire hanger, a match-less toddler's sock and some duct tape.

Just call me MacGyver!

{As a side note, I am terribly ashamed to admit that I found that child's sock under the oven when I removed the bottom drawer. Seriously?? How the heck does a toddler's sock end up under the stove??? Hmmmm... maybe that is the end of the worm hole for all the socks that seem to magically disappear from my dryer?? Eureka! Then again, maybe we're just slobs with fire hazards and sockless children. Sorry, I mean half-sockless children. *sigh*}

Anyway, I became MacGyver and created this...

A beautiful wire toddler sock rose! LOL

You can't tell in the picture, but I also stuffed a small piece of paper towel into the sock before I taped it all up to try and give it a little more depth. I then sprayed the sock with some cleaner (Shaklee Basic H - degreaser formula) and stuck my sock-tool up into that gap at the bottom of the door. It took a lot of awkward maneuvering because the gap is so narrow and my sock-tool was pretty flat (because otherwise I wouldn't have been able to get it up in there in the first place) {TWSS} but I did my best to rub that sock-tool back and forth along the messy spillage inside there. 

It didn't do a perfect job by any means, but all things considered, it worked fairly well and I was quite proud of myself. {sorry I don't have any pics of the sock-tool in action, but I couldn't manage it all by myself}. Here is the finished result...

Much better looking! A nice clean in-between oven window!

As I said, it isn't perfect by any means, but it certainly looks better than it did before! Let's look at a before and after comparison...


How much better it looks now that in-between the oven door windows is a bit more clean!

Not perfect, but much better! Not too bad for an amateur! :) And that's how you clean between the glass of your oven door!

Now... I am sure there is at least one of you out there with a spill issue in-between their oven glass panels! Thanksgiving drippings anyone?? ;)

{Note: as mentioned, I may have been able to just take off that front panel, but I didn't want to risk messing with all that dis-assembly and whatnot so this worked just fine for me. Do whatever feels safest for you!}


**UPDATE** - A few months ago, I did a DEEEEEP cleaning of the oven, taking the door of the hinges and crawling in there to scrub and everything. Since I had the door off the hinges, I decided to see if I could, in fact, get that frong panel off so I could more easily access the glass. As you can see in that one photo above, there were some screws along the bottom of that front panel so I decided to try those. I unscrewed them in the hopes the stainless steel panel would just lift off, but it seemed to still be attached somehow at the top of the door. There were no visible screws up there and the panel wouldn't easily just pop off so I decided not to force it. However, I was able to lift the bottom edge up (while the top edge was still attached) and create a gap big enough to allow me to more easily get in there and wipe those glass panels clean. It was definitely more easy to clean them than going the wire hanger/toddler sock route, but if you don't have panel screws on your door or are too nervous to mess with your door, just continue to enjoy the hanger trick! :)

This post was featured! Thank you! Please be sure to check out these awesome blogs!

 Organize and Decorate Everything


Linking up to these parties:


Pin It!

Tuesday, July 26, 2011

A Small Change = A Big Change


A quick and easy change can make a big difference.


Man - that vent cover looks awful!


$10 later and it looks GAW-juss!

Not sure why I waited 2 years to change out that stupid vent cover in our kitchen. It was so gross from the previous owners covered in grease and grime and was full of dog hair. Blech! Now, it looks so purdy! And the air actually comes through it!! Go figure! LOL. Funny how sometimes you don't realize how bad something worked/looked until you fix/clean/change it. LOL.

Pin It!

Monday, July 18, 2011

How I store my sheets

How do you store your sheets? Do you fold each sheet individually and then put sets in piles? That is how I used to do it. And my closet looked like this...

Piles of sheets


Not necessarily terrible, but not the nicest looking pile either - don't you agree?

Then I discovered the "pillowcase method" (as I like to call it). Here is the dealio...

1 - Fold the flat and fitted sheets from your set as you normally would. {Wow, those are some wrinkly sheets! LOL} {Oh, and yes, they will stay that way - the 3 yr old doesn't care if her sheets are wrinkly} {Ok, you got me - the sheets on my bed look the same exact way} {Hello, my name is Kyra. I am a non-ironer of sheets}. {And clearly I don't even bother to get them out of the dryer and folded soon enough to prevent wrinkles. Such is my life. Sue me.} Ok, so anyway... fold each of your sheets however you like to fold them.

Lay out your folded {terribly wrinkly} sheets


2 - Take a pillowcase from the set and open it. Slide in your first folded sheet into the lower half of the pillowcase.


Slide the folded sheets into a pillowcase


3 - Slide in your second folded sheet on top of the first. Add any extra pillowcases.

Peek a Boo!


4 - All of your sheets should be in the lower half of the pillowcase. Fold over the top half of the case to create a nice little neat package.

Nice little package!


5 - Admire how much nicer your linen closet looks now!

Much neater now! I love organized sheets!


The nice thing about this method is that when you want to change the sheets on a bed, you just grab your nice little packet and carry it easily to your bed. No searching for missing pillowcases, no juggling of crazy fitted sheets that want to pop open when you look at them funny... just a nice organized packet of linens. :)

Niiiiice! :)

What do you think? Better, huh? How do you organize your linens? Do you use my "pillowcase" method? {'cause, after all, I invented it you know} {and you probably owe me some sort of commission or royalty or residual check if you do} {heehee - I think I need to get more sleep!} {maybe the wrinkles in my sheets are disrupting my sleep??} {OK, I'd better go schedule this post and get to bed!} 


{  :) }


This project was featured! Thank you! Please be sure to check out these amazing blogs (and their parties!)


Linking up to these aprties (also see linky tab above):
Polish the Stars
A Bowl Full of Lemons

This project has been submitted to The CSI Project: Organization Ideas Challenge

Visit thecsiproject.com

Pin It!

Wednesday, July 13, 2011

Boxes on our Walls - Part 4 {Assembling}

When I left off before, I had cut all of my molding pieces and gotten out this baby...


I gave this Nail Gun and Compressor to the Heela for his birthday this past year and he graciously showed me how to use it for this project. Now, you could clearly do this project with a hammer and nails, but if you have access to a nail gun, I highly recommend using one!

If you want a play-by-play visual of how to do this, check out THIS POST here by Thrifty Decor Chick. She actually made a video of the process and it was my go-to guide! I won't go into too much detail since that video is so great, but here are the basics...

{NOTE: Before you start assembling your boxes, I recommend painting your wall (if you plan to) as well as painting your molding pieces. According to all the research I did, it is much easier to paint everything before you put the molding up on the walls. Then later, you just fill in nail holes, caulk edges and touch up paint where necessary. I admit I had the luxury of skipping the painting step altogether since we had hired painters to come do our entire lower level the week after I did my boxes. But if we had not had them coming in, I would have painted everything before nailing, etc.}

Starting at the edge of your wall, use your spacer to determine how far away from the edge/top/bottom your left piece of molding needs to be. I cut my spacer from a paint stirrer/stick.

Use a pre-cut spacer to determine how far from the edge/top/bottom you need to be.


Use your level to make sure your molding is straight.


Make sure it's straight!


Nail in place using nail gun or hammer and nails. Line up the corner of the top piece and repeat the process, then repeat with the right piece, and lastly with the bottom piece. Don't worry if you have some gaps as they can be hidden later with spackle.


Align your angles to make a nice corner.


Here is a finished box - ta da!


For boxes on the same wall, again use your spacer to ensure you are the proper distance away from the first box and from the top. Continue, continue, continue. :)


Use your pre-cut spacer to make the positioning of your boxes easier.


Here is how it looked once I had all my boxes up (before caulking, filling in nail holes or painting).


LOVE!


Your next step would be to fill in all of your nail holes and caulk the edges. As mentioned above, I did not have to do this step myself since the painters we hired to do our lower level preferred to do it themselves. However, go HERE to see recommendations on this step (again from the fabulous Thrifty Decor Chick - she rocks!).

Lastly, your final step would be to touch up any paint. Again, since we had the painters coming in the following week, I was able to avoid the paint process. Here is the final result after they had caulked and painted a coat of primer.


Already looking so good!


And here is the final result after the walls were painted (Sherwin Williams Balanced Beige) and the area below the chair rail was finished out in semi-gloss white.


Finished {mock} Wainscoting - LOVE!


And here is a before and after collage...

What a nice change!

SO?? What do you think? How'd I do? Personally, I love the way the boxes came out! I plan to do some more in the dining room and on the upper landing (where we already have chair rail). Those areas have already been painted white semi-gloss so I'll just need to add my boxes (I'll paint them before hand) and caulk. I'd like to add some along the stairs too, but those require a little lot more work since they will have funky angles. We'll see if my math skills are up to the test - someday! ;)


I'd say this project was a fabulous success and couldn't be more pleased with how it came out. :)


**You can see the rest of this series here:
Part 1 - Idea
Part 2 - Sizing
Part 3 - Cutting


This post has been featured - THANK YOU!! Please be sure to check out these amazing blogs!


UndertheTableandDreaming


Linking up here (see tab above for more details):


Pin It!

Thursday, February 24, 2011

Big Girl Room #1 - Hand-Painted Flowers


Prior to buying our current home two years ago, we lived in a modest townhouse that I had purchased on my own (i.e. - pre-Heelamonster in my life). After the Heela moved in, we decorated a few rooms here and there, including both of our daughters nurseries once they came along. Since we didn't find out our first child's gender, we had to decorate it in a neutral theme so we  I chose Classic Winnie the Pooh. I did most all of the decorating work by myself since the Heela was traveling alot back then and, if I do say so myself, it came out pretty darn good! (I hope to post more details on that project later, but here is a pic).


Glimpse of SweetPea's Nursery in Old House

Painting that room had been ALOT of work (granted I was 7 months pregnant at the time) so when we moved into our new house, I just had no desire to re-do that nursery or all that painting despite the fact that SweetPea was still in her crib. Besides, I knew it wouldn't be too long before she moved into a "big girl bed" and the decor would need to be updated at that time anyway. So we left the room in its natural, move-in state and I simply used the Winnie the Pooh accessories to make it liveable for a little while. Here it is in all its sad, pathetic and very plain glory....


SweetPea's Nursery in New House

But when it came time to upgrade to a big girl room, I still had no desire (or energy) to paint the whole room. So I racked my brain to try and figure out how I could add some LIFE and COLOR to the room without having to deal with tape and primer and trim and all that [crapola].

Meanwhile, I came across this awesome comforter cover on clearance at Company Kids. I loved all the bright colors (hmmmm.... no wonder I like the colors of THESE costumes so much!) and knew I she just had to have it.


Comforter Cover bought on clearance from Company Kids


I also liked the fact that it wasn't all ~{Little Girly}~. I figured it would be great if I could find a style that wouldn't absolutely need to be changed in the next few years (i.e. - Dora, Princesses, Elmo, etc.) when SweetPea was 5 going on 15.

And then it dawned on me...


Those flowers look hand painted...


What if I could re-create those comforter flowers...

 ...on the wall?!?!

YES!!! That's it!!

A friend of mine had recently painted a Curious George mural on her son's wall using a basic image found on the internet, projecting that image onto the wall, tracing the image and then painting it in. Easy Peasy!

So, I immediately scanned each of the flowers onto my computer, (splicing multiple scans as necessary) to get .jpg images like this...


I then used a projector (borrowed from work) to project the images onto the wall. Once each image was where I wanted it, I traced the general form with a pencil. (I apologize for not having any pictures of the process - this was pre-blogdom. SO SORRY!). Then I started painting. [I had taken one of the pillowcases up to Lowes and bought the small sample jars of paint (Valspar) in each color of the flowers. I didn't officially "colormatch" them - just eyeballed using the paint swatches. And since I only needed one sample jar of each color, it really wasn't that expensive even though I had 6 different colors]. I had to work in layers to create the flowers, so it took pretty much all day to finish it all, but I couldn't have been more pleased with the results!! And...

{{TA DAAA!}}


Flowers painted on wall to match bedding


I think those flowers came out pretty darn good, if I do say so myself! :)


Close Up


Close Up


And here are a few more pics of the updated room.


The vinyl over the bed says "Always Kiss Me Goodnight" (found on clearance at Kohls for $4)


New girly curtains replaced the heavy, formal ones left by the previous owners.

Green Gingham Panels and Hot Pink Sheers all bought on Clearance (Lowes and BB&B)


This is actually a bath rug but it matched perfectly! (bought on sale at Kohls for $6)

A large green tub at the end of the bed holds (way too many!) stuffed animals.

And I had to add a photo of this awesome little table light from Ikea (not seen in original photos above). Originally I had borrowed a normal old lamp from our guest room and put that on SweetPea's nightstand. But after she burned her fingers on the lightbulb while trying to turn it off one night, I knew I needed something different. I eventually found this little thing at Ikea.

Ikea Table Lamp

It is completely plastic so it won't shatter if it is knocked over. And the lightbulb is totally enclosed (even on the underside of the shade!) so no burned fingers! It has one of those little switches on the cord which SweetPea loves being able to turn off and on herself. I will admit that it doesn't give off a whole lot of light, but it is still enough to read by without using the overhead light. Which is this monstrosity...


Impossible to get a good photo of this light.

I'm not really into these chandeliers but they were here when we moved in. If this had been in the master bedroom, I would have taken it down immediately - just not my style - but I figured it could work in a little girl's room. They each have one. We call them the "sparkle lights" since they make fun designs on the ceiling and the prisms make colorful rainbows on the walls. Not to mention that everyone knows monsters are afraid of "sparkle lights" when they are on the lowest dimmer setting. ;)


I want to paint the lovely {NOT!} brass skelton of that light, but haven't gotten around to it. Plus, I really don't know what color to paint it. Got any ideas? White? Silver? Would love to hear your feedback!


Lastly, on the dresser, is... A green basket I picked up for about $5 on sale at Michaels - it currently holds hair detangler, body lotion, etc.  The "A" was in the Dollar Spot at Michaels. The little bird is from a set my mom gave the girls last summer. The piggie bank is from Target - picked it up during a sale - SweetPea loves to put coins in it.


Needless to say, my daughter absolutely LOVED her new BIG GIRL ROOM!


SweetPea was so excited about her new room!

 
As always, here is the Before and After


BEFORE

AFTER


Linked up to the CSI Project's Kids Places Challenge!
Visit thecsiproject.com 


Also linked up here:

 
Thrifty Decor Chick
Roomspiration


Pin It!
Related Posts Plugin for WordPress, Blogger...