Showing posts with label Quick Tip. Show all posts

Wednesday, July 11, 2012

How to {frugally} Dress up a Dessert Plate

I know I am a little late with this post as it relates to a craft I did for the 4th of July, but you really can use this "trick" for any occassion so I figured I would share it anyway. It's fast, super easy and cheap frugal. Just the way I like it! {TWSS} ;)


How to dress up a simple dessert plate


We went to a BBQ for the 4th of July and were asked to bring a dessert. I raided my pantry and found a box of funfetti brownie mix that I had bought on clearance after Christmas for some ridiculous price like 50 cents. The kids helped me whip the brownies up and instead of using the green, red and white "funfettis" that came with the mix (since the colors weren't exactly patriotic), we used our own mix of sprinkles from the pantry and just sprinkled them on top. YUM!

Who doesn't love some gooey brownies??

When it came time to pack them up and head out to the BBQ, I decided not to use one of my fancy glass/metal/ceramic platters so I wouldn't have to worry about cleaning it off when we left or leaving it there or whatever. So instead, I went for my dessert plate "trick" of choice which is to dress up a simple disposable plate.

First I selected a plate. I've done this before using those nice thick paper plates but didn't have any in my "stash" that day, so instead, I used a simple white stryofoam plate. Really any type of disposable plate will work for this project as long as the plate isn't too thick. You'll see why in a minute...


Next I took a hole puncher and made holes around the outer lip of the plate - about 1" apart. I just eyeballed it. (This is why you don't want the plate to be too thick or plastic or something that would be difficult to hole punch).


Then I found a piece of ribbon in my "stash" and threaded it through the holes.


Tie it off with a bow and TA-DAAA! From drab to FAB! :)


Since it looked a little too valentine-ish with all that red and white, I colored a few simple stars in the gaps with a blue Sharpie. Much better and definitely nice and patriotic. :)


Everyone thought the plate was so cute and I had no qualms about leaving it at the BBQ to be thrown away later!


What are some of your favorite ways to dress up otherwise plain items?


Linking up to these fun parties - be sure to check them out:
Someday Crafts
The Thrifty Home
The Frugal Girls


Pin It
Pin It!

Monday, June 25, 2012

Re-Generate your Green Onions? It's true!


Several months ago I saw an idea on Pinterest that claimed you could re-generate green onions simply by placing the cut off stems in a cup of water. Ummmmm. Really? I mean, REALLY??? OK, I gotta admit, I was pretty skeptical. In fact, I didn't even repin it to any of my boards as I wasn't sure I was buying it.

Well, I happened to have a bundle of green onions on hand the other day for a recipe. So, I decided to give the old idea a try. I mean, it was worth a try, right? Well... follow me this way...

First I cut off the green stems and left the white roots strapped together by a rubber band.

How to re-generate green onions


Then I dropped the bundle into a small tupperware container, added some water and placed it on the pathetic miniscule just plain old sad excuse of a window ledge in the kitchen.


re-grow your green onions


Then I waited.

But not long.

Because...

By Day 3, my stubs looked like this...


And by Day 5, we were here...


And just ONE day later we already had this!


On to Day 8...


And here we are at Day 15. So it took about 2 weeks to get to this point. A not-quite-so-perfect, but damn-good-enough batch of green onions! WOW!


Regenerated Green Onions

What do you know?? It actually worked! Go figure! I will never buy green onions again! OK, well, that may not be true. To be honest, my re-growth isn't quite as "hardy" as a new batch of onions from the grocery store would be. But they'll work! And I can't say if these will re-generate again after I cut off those new green stems. BUT, I defintiely plan to give it a try! :) And I'll be sure to come back and update ya!

In the meantime, I highly recommend this trick at least once!


This post has been featured! Thank you so much! Please be sure to check out these fabulous blogs and their parties!


IhookedupwithHoHlamespice

  
Linking up to these fun parties:


Pin It
Pin It!

Saturday, March 10, 2012

Stuff it! {aka - How to make snacks go further}

Today I'm going to share a "Quick Tip" with you...


Have you ever found a really cute bowl in your 'stash' or in a store and wanted to use it for chips, cookies, rolls, whatever, but then realized you would need to fill it with, oh, I don't know....  about 5,000 POUNDS of said chips, cookies, rolls, whatever so that it wouldn't look pathetically empty? Yeah. Me too. Sucks, don't it?

Well, I'm here to share my little secret with you on how to get around that little dilemma...

NAPKINS!


Yes, you read that right, I use paper napkins. {and, yes, you could easily use cloth napkins if you want to be more green, I just prefer to use paper - especially if they already match my theme. sue me.}. The first time I discovered this trick was during the great popcorn fiasco. Haven't heard that one? Oh, do let me share...

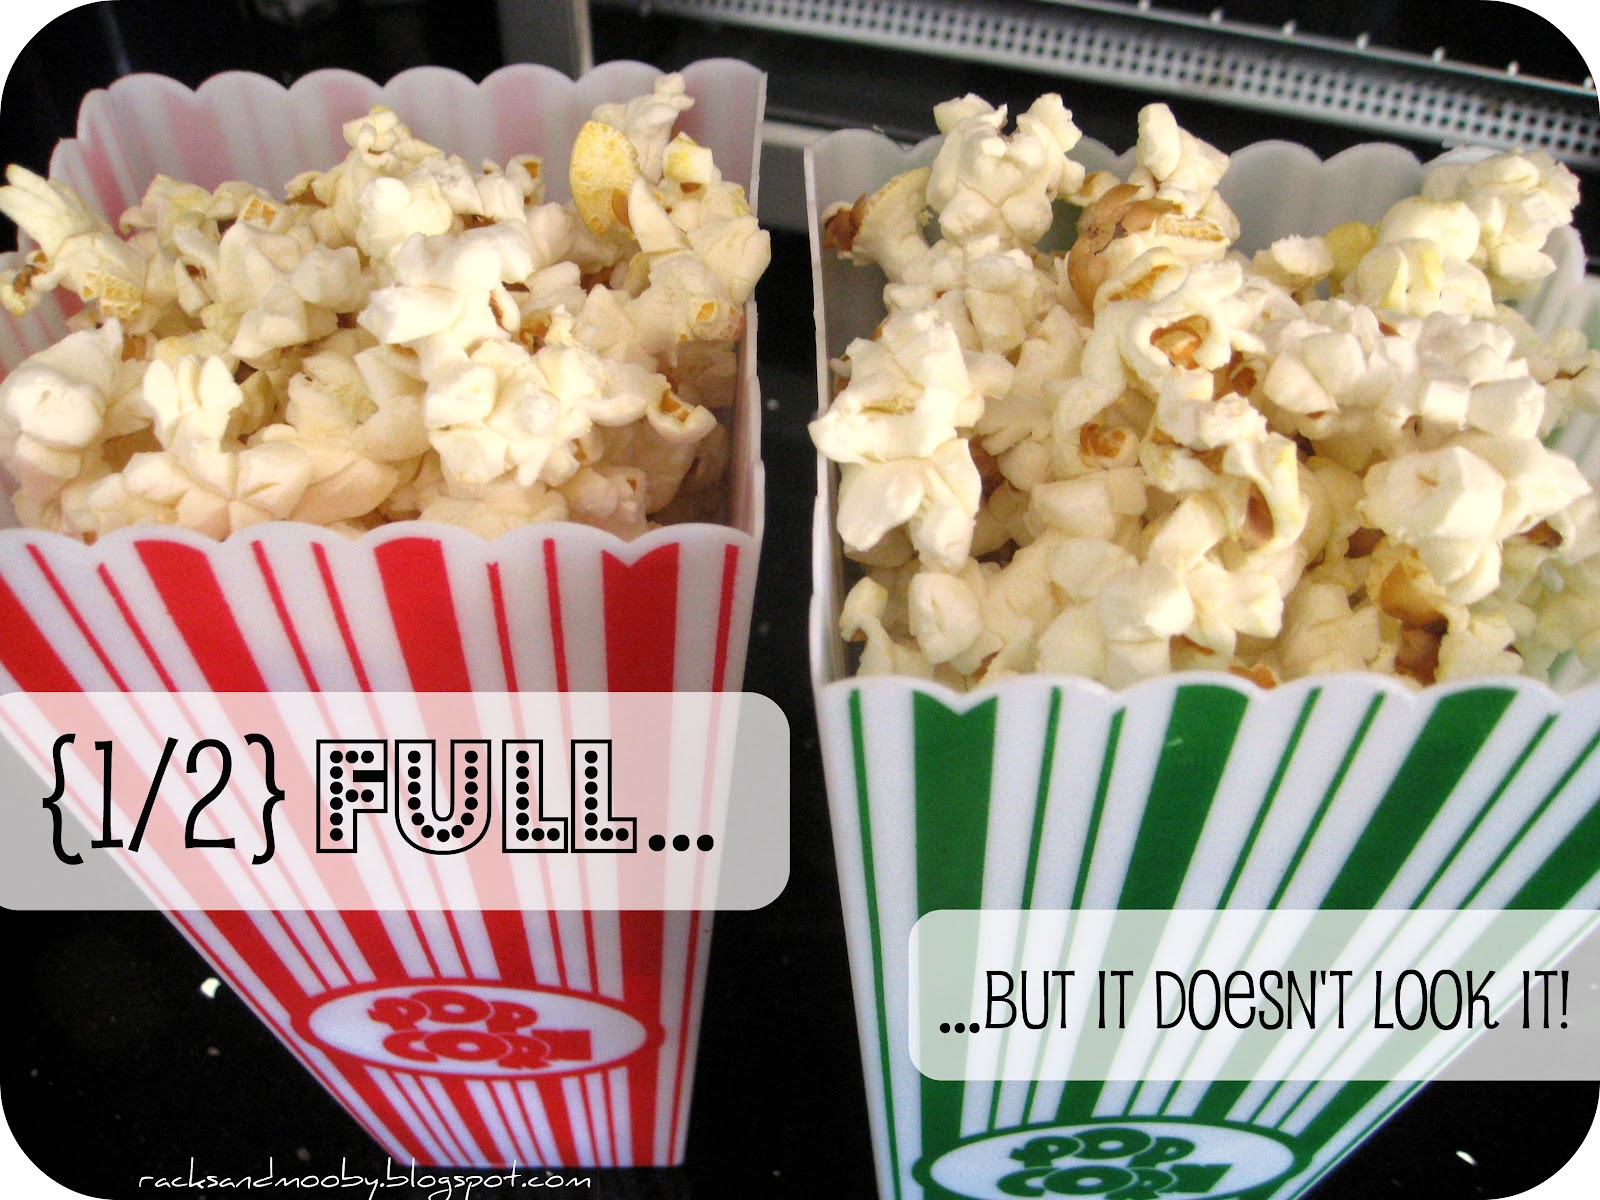
Sometime last summer, I found these super cute plastic popcorn containers in the Dollar Spot at Target (it's so dangerous to wander in there, isn't it??). I got one in each of 4 different colors. So cute, right?

Plastic popcorn containers from Target


The only problem was that they were just way too deep to fill all the way up with popcorn for my pre-schoolers. There was just no way they could eat all that popcorn. Well... on second thought... maybe they could, but they didn't need to! ;)  So, I usually make one of those 100 calorie packs and let them share it between themselves. But when I dumped 1/2 of the bag into each container, they only got filled up about 1/2 way full.

Well, if you have little ones, you know that THAT was NOT going to fly. Don't mind the fact that this is the SAME AMOUNT they would always get in the OTHER BOWL I used to use...

As far as they were concerned, there was PLENTY OF ROOM LEFT! They wanted the container to be filled up to the TOP!!!!!!!!!!!!!!!!!!!!!!!!!!!!!! Give me MOOOOORE!! Hey, and while I'm at it, I'd like to point out that... SHE has MORE than I DO!!! MOOOOOOOOOOOOOOOOOOOOOOOMMMMMMM! NO FAAAAIIIIIIRRR! {ever hear those kind of shrill cries coming from a 3-year old?? yeah, good stuff.}

So, I quickly drank a shot of tequilla improvised and stuffed a loosely-crushed napkin down into the lower half of the container to help take up space.


Then I poured the popcorn back in (which now went right to the top) and the rugrats couldn't have been happier. And it isn't like they didn't know the napkin was in there. I guess it was the ~visual~ of a half-empty container that just didn't sit well with them. You know, like I was trying to gyp them or something. Not that I have ever tried to do that to my children. Ahem. Moving on...

(and yes, that is how you spell "gyp" - looks weird, I know, but I checked Webster's HERE and it's right).


Sneaky, sneaky!

Ahhhh... peace and harmony had been restored to our household... at least for the next 5 mintues. :/


I also used this trick during Boogey's RAINBOW party (posted HERE). I had found some cute colored buckets at the party store and grabbed them on a whim, not really knowing for sure how I planned on using them. Ultimately I decided to use them to house some chips, pretzels and goldfish. But they were so deep that I knew I would need double the amount of chips, pretzels and goldfish than I had just to fill them up to the top. Um, yeah... not going out to buy more snacks, especially when I know they won't all get eaten anyway.

Insert... the napkin trick!


Use a paper napkin to take up space in the bowl

I ever so slightly wadded up a paper napkin and stuffed it into the bottom of the buckets. The napkin minimized the amount of open space in the buckets so I was able to use less snacks to make them look "full" and, therefore, make my snacks go FURTHER! Yay!


Make your snacks go further! It's all an ~illusion~!

Of course the napkin trick won't work as well with really heavy snacks but works great with things like chips, crackers, etc.  If you have something that is heavier, you should, instead, use an inverted bowl or cup as your filler. This is a pretty common trick for vases and such and would be a great option to make heavier treats like M&M's and other candy items go further. Yes, it's all an ~ILLUSION~ folks! :)

And that's my 'quick tip' for the day! Do you have any food display "cheats" you like to use? Let me hear about 'em!

p.s. I want to say a quick "THANK YOU" to Michelle over at Macaroni Kid for featuring my Rainbow Cupcakes on the Macaroni Kid (Harlem edition) website {Click HERE to see it!}!

This project was featured! Be sure to check out these fabulous blogs!!


Pin It

Linking up to these parties - check  'em out!
Someday Crafts
The Thrifty Home
A Turtles Life for Me
Bacon Time with the Hungry Hypo
Polish the Stars
Keeping it Simple
The Scott's Crib


Pin It!
Related Posts Plugin for WordPress, Blogger...