Sunday, January 30, 2011

{Lollipop} Flower Pot

So a couple of days ago, I told you about the "Pink Monkey" birthday party I am planning for Boogey. I've got lots of DIY decorations planned which incorporate this theme and have finally crafted the first one.

A {Lollipop} Flower Pot!

Now before I go any further, I want to provide full disclosure that this is not my original idea. Truth is, I saw this project over on Primitive and Proper earlier this month and decided that I totally had to steal borrow this idea (and don't worry, I've already let Cassie know it was coming - she's cool! If you haven't checked our her BLOG, you really should. She is especially talented at refinishing old furniture! :)

Following Cassie's lead, I gathered all of my supplies:

- Small metal pail - $1.19 at Michaels (using a 40% off coupon)
- Two pack of 4" circle floral foam - $1.00 at Dollar Tree
- 3/8" Dowel  - $0.59 at Michaels for a 36" piece (I cut it down at home to a shorter size)
- Lollipops - ~$8.00 at CVS for a bag of 200 DumDums (but we only used about 60 of them for this project - lots of leftovers!!)
- Two 4" circles cut out of card stock from my old scrapbooking stash (I used my new Silouette to cut these but you could simply trace the floral foam onto card stock and cut with scissors)
- Two Flower and monkey images printed out on copy paper (from the file I purchased online which I discussed HERE)
- Glue stick and hot glue gun 


First, I cut one of the foam circles into a square that would fit into the pail. I shoved some of the leftover pieces into the gaps to make it more snug (not pictured below).


Next, I stuck one end of the dowel into the pot and the other end into the remaining foam circle.


My "camera-shy" girl just couldn't help herself...

Then, I just stuck the lollipops into the circle working my way around the edge until the whole thing was covered fairly well. Even the SweetPea helped a little with this task - she was very proud to assist in a special project for her little sis!


I had originally planned on using some brown paper shreds to cover up the foam in the pail (similar to what Cassie had done), but my "flower" seemed kind of top heavy - I think I cut my dowel a little too long. So I took some glass beads that happened to be in a jar nearby and dumped them on top of the floral foam in the pail. {Thanks to the Heelamonster for the great suggestion!!}. Doesn't look quite as nice as the paper shred would have, but it'll work and adds the stability I needed.


Next, I glued the green flower and monkey image to the pink circle using a glue stick. And then glued the pink circle to the foam circle using my hot glue gun.


I lucked out at Michaels and found this super cute ribbon in the Dollar Bargain Bin. It couldn't be a more perfect match!! So I tied some around the dowel (which I was too lazy to paint) and.... VOILA!


I think it came out pretty cute!


Could have glued it a little better... but, eh, they're 3 year olds!


Not too bad for about $3!
:)


Pin It!

Wednesday, January 26, 2011

Pink "Mod" Monkey Party - Part 1

So Boogey's birthday is coming up in a few weeks. She'll be 3. I really can't believe it - time sure flies!! Anyway, she wants a "pink monkey" party (that girl LOVES her monkeys! Which, to be honest, is rather fitting - she is quite the monkey herself!). Of course, I wasn't quite sure what, exactly, she meant when she said she wanted a "pink monkey" party but I figured I'd do my own interpretation. So I scoured the internet for ideas and was really drawn to the "Mod Monkey" theme such as seen here. I showed it to Boogey and she approved whole-heartedly! :)


But being the cheapo frugal girl that I am, I didn't really want to spend a ton of money on party supplies such as "theme" plates and napkins. And I wanted to be able to personalize some of my own crafts (such as the banner I made for SweetPea's Batman party). So I searched online for a free image of this monkey but just couldn't find one that would print up nice and clear. *grrrrr*

Then I found the website Cupcake Cutiees. They sell a TON of downloadable .jpgs and .pngs and had the perfect reproduction of the 'official' mod monkey. The file only cost me $3.00 to download and provided me with the perfect designs/paper/images to allow me to do my own projects. The one I chose was called the "Girl MOD Monkey" (seen below). [Unfortunately, it looks like it is no longer available for purchase - sorry! :( ]  It came with the following virtual items: 4 papers, 2 tags, 3 flower images, and 4 monkey images.


I used one of the "tag" images and the big dot "paper" to create the party invitation. I assembled everything in Powerpoint to my liking and then just printed them out on plain copy paper using a color printer. I used a glue stick to adhere the printed out pages to some blank notecards I already had. Here is what my invite images looked like before printing and glueing. (names/dates/info have been changed for privacy purposes):


Homemade Mod Monkey Invitation - outside


Homemade Mod Monkey Invitation - inside

There will be 10 kids there under 5 years old. I wish we could invite more, but we just can't handle a huge party in our home so we had to make some difficult cuts! :(   Anyway, I've got some fun ideas planned for decorations and activities for this party!! I'll be blogging about a few of them as they come to life. And the rest you'll see at the big reveal after the party. So stay tuned!!

**See Part 2 of this Pink Mod Monkey Party (including decorations/food/etc.) HERE!!

{Legal Stuff - I have not been compensated in any way by  Cupcake Cutiees for my mention of their website. My opinions are my own and I paid full price for the download file.}


Pin It!

Sunday, January 23, 2011

Recycled Crayons

So I was alone with my girls last weekend. The Heela had to work both Saturday and Sunday so it made for a lot of "girl time" for SweetPea, Boogey and me. On Saturday, after taking them to the eye doctor to pick up my new glasses, letting them play in the mall playground for 20 minutes, buying them each 3 rides on the Bob the Builder riding thingy, sugaring them up with a bright blue ICEE and trudging them through  ToysRUs to find a present for an upcoming birthday party... I brought them home and immediately sent them upstairs for some quiet time. Frankly, I'm not sure who needed it more - them or me! ;)

Boogey slept right through lunch and didn't come down for over 2 hours! That girl was wiped out! (despite being 3, she still loves her naptime). But SweetPea (who recently turned 4 and is pretty much "over" naps) showed up in the TV room after about 30 minutes. *sigh*. I convinced her to occupy herself for another 15 minutes or so by reading books. Then we went 2 rounds at HiHoCherry-O! and once on the Ladybug Game. Then... she was bored.

"Mommy.... I'm booooooorrrrrrrreeeeeedddddd".


I'm sure more than a few of you are familiar with that lovely whine.

I know she loves to do crafts so I was about to take her downstairs to dig something out of the "Craft Box". Then I spotted this on the floor... our BIG box 'o' crayons.

This box is 13" x 7" - it is an understatement to say these girls have a ridiculous amount of crayons!

I've seen many blog posts out there about "recycling" old crayons so I thought... why not?... let's go for it!

So I dumped out all the crayons onto the floor and SweetPea and I picked out all of the broken pieces, then set about to peel off all the wrappers. 

Thankfully, I wasn't ruining a good manicure with all this peeling. (haha!)

Big pile 'o' wrappers!

We worked, for the most part, in quietude and I was impressed with how diligently SweetPea was working on this project.


We then separated our unwrapped crayons into similar color piles.

Before
After

Next we broke the crayons into small(er) pieces and placed them into some silicone cupcake liners that I bought about a year ago in the dollar bins at Target.


Initially I put them in the oven at 170 degrees for about 15 minutes since that is what the first website I googled indicated (it actually said to heat the oven to 150 but our oven won't go any lower than 170). But after an additional 5 minutes, the crayons had barely softened, let alone melted. So I googled a few more articles and they all indicate you should use a 300 degree oven for about 10 minutes. So I cranked up the heat and waited a bit more.

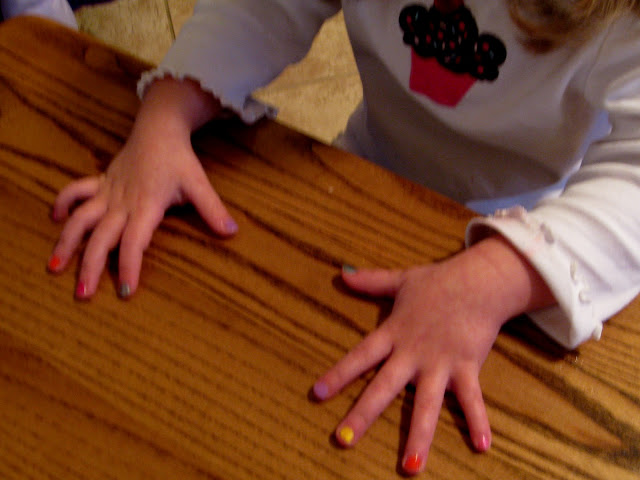
Meanwhile, Boogey had come downstairs to join us so while we waited for the crayons to melt, I painted the girls' nails. If *I* couldn't have a nice manicure, at least the 3 and 4-year old could! :)

Boogey waits (im)patiently for her nails to dry

Man... if only I could wear rainbow fingernails to the office!!

Finally, the crayons were melted so I took them out of the oven, placed them onto a fresh cookie sheet and placed them out on the back deck (where it was damn cold!). 


Ready to go outside to cool.

They set up pretty quickly outside and we peeled back the silicone easily to reveal some super-cool NEW crayons!


They kind of look like the jello jigglers that I usually make in these molds! LOL

The colors weren't as swirly as I had hoped (I probably just "stirred" them too much mid-way) but they still came out pretty cool, I think. :)


I have to keep my eye on Boogey with this one... she still isn't convinced it isn't chocolate!

Yummy looking brown crayon

The silicone molds worked great since the flexibility of the form made it so easy to pop/peel out the crayons. But most directions you'll find on the web discuss making them in muffin tins so you don't need anything fancy. Just do a quick google search on making your own crayons/recycling old crayons and you'll find plenty of good tips.


Good luck!!


Pin It!

Friday, January 21, 2011

Awww, gee shucks! *blush*

You like me! You really like me!

I just noticed that I now have over 100 followers! I really cannot believe it. When I first started this blog last August, I can honestly say that I NEVER imagined that I would ever have more than about 10 followers (who would probably all be my good buddies IRL anyway!). But to surpass 100?? Wow. Just wow.

I am truly humbled and so genuinely appreciative of each and every one of you who takes time out of your day to spend a few moments with little old me. I certainly don't have the biggest budget for my projects, nor do I even have much time to do that many projects (let alone write up blog posts about them!!) but you keep following and that means the world to me.

I truly hope that I inspire a few of you by letting you know that you CAN be a wife AND a mom to 2 toddlers AND a full-time corporate-world employee and STILL find time to do pretty, but CHEAP FRUGAL projects that aren't all that time or labor intensive. It IS possible!! :)

So THANK YOU!!

To celebrate this wonderful milestone in my blogging life, I plan to have a giveaway in the coming weeks. Not sure what exactly it is going to be yet or exactly when (don't forget who you're dealing with here! LOL) but I expect it should be something pretty fun. :) So stay tuned!!

IN ADDITION, I want to acknowledge a few blog awards I've received recently. 


(YAY ME!)
:) 

First, I want to send a big {THANK YOU} to Andi over at Jane of All Crafts who awarded me the "Liebster Blog Award". 
"Lieben" is German for "Love" and this award is intended to recognize the "smaller" blogs without lots of followers (i.e. fewer than 300) and is a way to get the word out about blogs you may not have heard of, but are worth checking out. Thank you so much, Andi, for showing me some "Lieben"! :) 


Secondly, I would like to send a big {THANK YOU} out to Maleah at Little Eme who awarded me the "Trendy Blog Award"! This award is supposed to be handed out to blogs who are "trendy". Many thanks, Maleah, for thinking I qualify!! :)

[Just for full disclosure, I am supposed to pass these awards forward to something like 10 blogs each. I just don't have time to do all that right now, but I will try to get back to this when I can!]


THANK YOU!!!

Pin It!

Wednesday, January 19, 2011

HOT DEAL!! Get a $20 Amazon.com Gift Card for only $10!

TODAY ONLY you can get a gift card for use at Amazon.com valued at $20 for only $10 out of pocket.

This is through a website called "LivingSocial" (which is yet another one of those group discount sites). This is an amazing deal and if you ever shop on Amazon, I highly recommend taking advantage of it!! I sure did!!

Click HERE to get yours!


Pin It!

Tuesday, January 18, 2011

Can you cut it??

I totally forgot to mention what I bought for myself for Christmas!!!

 {Well, that isn't exactly true. I didn't forget about it. I simply hadn't taken it out of the box until today. Even though it arrived at the beginning of December. *sigh* I told you I've been swamped since SweetPea's birthday!!}

Ta Daaaa!


Yes, I jumped on the Silhouette bandwagon! I've been wanting a digital cutter since my scrapbooking days (we're talking PRE-marriage here!) but could never justify the cost. Especially since the "older" ones required all sorts of cartridges and storage space and all that. But when Silhouette was running that amazing promotion over the Thanksgiving holiday I just had to take the plunge!


I finally broke it out of the box today during my "lunch hour" (I worked from home today due to a slick ice storm in the area) and gave it a try. Boogey's birthday is in a few weeks and I am getting geared up for that. So I tried cutting some scalloped circles for cupcake toppers as well as some cute Happy Birthday "tags" that I'll use in some hanging decor.


Perfect for a cupcake topper!


Just look at the clean cuts on this... amazing detail!!


Sa - weet!

Wow. Just wow.


These are just on cardstock - pretty nice! I also bought a few rolls of vinyl so I can't wait to try my hand at those too! Squee!!


Pin It!

Sunday, January 16, 2011

Score! at Target

Whenever I go to Target, I always make sure to go around the back endcaps. Why? That is where they put all the clearance items!! :)

Today, I came across 2 packs of toddler underpants for the Boogey. They were only marked down 30% but we were actually in the market for some new ones so I couldn't pass them up. Ended up being $15 for 20 pairs - not bad considering they are Hanes brand and Elmo designs. (And, yes, I realize it is pretty sad that I get excited about a good deal on underpants. Such is my life.)

But my REAL score was this...


A Black & Decker cordless screwdriver! With 9 different heads! And.... it's PINK! {Not that I am some sort of pink fanatic, but at least the Heela will be less likely to steal it!}

 And what makes it the best SCORE is this...


Yup! Less than $6 for this baby! 75% off !! Squuuuueeee! Love me a good bargain! There were quite a few of them - you may want to check your local Target to see if they have them there too.


(for the record, it looks like this same one is available at Lowes/Home Depot for about $11 - but only in orange - boooooring! ;).


Pin It!

Monday, January 10, 2011

Valentine Specimen Art {Shortcut Style}


Hello! How are you? I am still trying to recover from the holidays and have also been super-busy at work getting the year-end closed out. I actually had to work this past Saturday! YUCK!! And it was an even bigger bummer since that meant I couldn't road trip to Philly with the Heela and the girls for a family get-together. Booo! :(

However..... the only upside to working on Saturday and not being able to go to Philly was that I got a few hours on Saturday evening and Sunday morning to myself.

SA-WEEEET!

Now, don't get me wrong, I truly was disappointed that I couldn't go to the family party... but I have to admit it was so incredibly amazing kind of nice having the house ALL TO MYSELF for a few hours. No kids... no husband... ahhhhh.... heaven. *evil grin*

I mostly vegged out - got a massage, made cinnamon rolls for dinner, watched girly movies On Demand... :)

But I also decided to do a craft. Mind you, I didn't want it to be too time consuming - I've got relaxing to do!! But I figured I could squeeze in something quick and easy (thats what she said!). So, given that a new holiday is coming up, I decided to turn to my 'old faithful'.... some SPECIMEN ART!! :) I mean, c'mon, it wouldn't be me if I didn't pull out a version for Valentine's Day! :)


So I headed out to Michaels to see what I could find for Valentine's Day. I considered doing the foam shapes again since my snowflakes came out so good, but I felt like the glittery foam hearts just looked too cheezy and cheap. So I opted for some Martha Stewart stickers which had different designs and colors but had the consistency of the same shape which I like. They were only $1.99 for the pack and I used a 50% off coupon to score them for only $1! And once again, I raided my old scrapbooking stash for some colored card stock and used the same black frame from all my other specimen art.


A couple cuts of the paper to make some colorful mats, a little glue stick to hold the paper together, apply the stickers and VOILA!


As usual, I placed the paper on top of the glass so there would be no glare and so you could see the dimension of the stickers. These ones are barely 3D but they are raised just ever so slightly. Hard to see here, but they are kind of puffy (but barely).


I put it up on the mantle next to my trusty old red and black vase and red ceramic bird. I think the colors work great together!


Not bad for $1! What do you think? Another success??

Have you tried any specimen art? Please let me know if I've inspired you! I always love to see other people's takes on things!!


(In case you are a new follower, 
Here are links to my other forrays into specimen art if you're curious:


This post was featured - thank you!!


UndertheTableandDreaming


I also want to thank these bloggers for the "shout-outs"!


This project has been submitted to The CSI Project: Valentines Day Challenge
Visit thecsiproject.com


Linking up to these parties (also see Linky Tab above)
Until Wednesday Calls
Sew Chatty
Polish the Stars
Not Just a Housewife
These Creative Juices
Someday Crafts
The Thrifty Home
House of Hepworths
Between U & Me
What Allie's Making Now
Somewhat SImple
A Little Knick Knack
Momma's Kinda Crafty
Fast Daze
Simply Designing
Fingerprints on the Fridge
The Speckled Dog
Truly Lovely
While He Was Napping
Tatertots and Jello
Be Different... Act Normal
Craft Envy
Paper Issues
Under the Table and Dreaming
C.R.A.F.T.
Keeping it SImple


Pin It!
Related Posts Plugin for WordPress, Blogger...